Wednesday, September 4, 2013

The Description of “Stances” utilized in Oyata's Methodology


   Because of recent inquiries and requests for clarification, I've chosen to re-post the stance descriptions (that we utilize). I will also be re-posting lists of the hand and tuite techniques that we utilize/teach.

   The majority of Stances that are used in Oyata's Methodology are also used by most of the other Okinawan or Japanese systems (though possibly by various names). More often, the difference is in how they are instructed to be utilized in Oyata's system. Here, I will provide an explanation of how we (at our school) teach them to be performed.
  The “Left/Right” designation is determined by the Foot that carries the majority of the user's Body Weight. If the weight distribution is “equal”, the direction that the student is facing is the designator.
  These will only be basic explanations, covering general positioning and use.


Natural Stance
This stance is a “neutral” (ie. “non-threatening”) position..
Ready Position (Stance)   Similar in appearance to the “Natural” stance, it has certain advantages to it's use. Although “appearing” to be a “weak” position, it offers the user the most variance of possibilities for defensive purposes (without limiting their options, nor “exposing” their strengths and/or weaknesses). This is our most used stance (being one that an individual is most often in). Body weight is distributed evenly between both feet. (And being such a common position, we feel the best for practicing self defense from). Weight distribution is 50-50
Horse Stance (Side Stance, Naihanchi Stance)

  Horse Stance (and it's “variance”, the “Side Stance”), This is (yet another) stance to project stability in a required direction (in this case either “Forward” or to one side). Although most often used when practicing “Hand” motions & techniques, this stance is commonly used (as a temporary position) during the execution of various combination and Tuite techniques. For “practice” purposes, the Horse stance forces the student to concentrate on the motion being practiced (with the hands/arms) and still maintaining the position the body is in. (And also, for “practice” purposes) The feet are placed approximately 2 shoulder widths apart from each other, both knees are bent, back is straight and Weight is 50/50 between both feet

Forward Stance (Seisan Stance)
  Usually “taught” as a means of projecting power forward (which it does) it's improper use often places the user at an angle to the target (and is often from being taught incorrectly as well, thereby placing the user “off-balance”). It is important to note that the heel's of both feet project outward slightly (this aids in squaring the hip's). This stance has the user's body weight being distributed  70-30 with both feet pointing forward, and “inward” slightly (ideally foot placement being at approximately 45deg. Position from one another). Both knee's are bent slightly. It is often the "ending" position of the execution of a technique or a "body" weight shift.


Back Stance
  This stance shifts the user's body weight to the rear leg, while positioning the forward leg (“bent”) in readiness for a forward weight shift(with a 60-40% weight distribution). It is commonly taught with the rear leg “pointed” at 90° (as opposed to the 45° angle illustrated below) by “other” systems.The "Alternate" method is often seen in some of the higher ranked exercises ("Spiderweb", "Turtle", "Kumiawasi" etc.). 


Hourglass Stance
  This is a “transitional” position (stance). It's “purpose”, is to pre-position the body for use in many techniques including Tuite and Combination techniques. The Weight distribution is 50-50. As shown, the motion of “entering” this stance will place the “user”, at approximately a 45° angle (to an aggressor). This stance, (could) be “entered”, from either moving rearward (and to either side) as shown, or forward.


Cat Stance (“Special”)
“Technically” (as per Taika), there is no “Cat Stance”, yet, the position exists in several kata (?). The “position” is actually the ending position for (several) techniques. The heel of the forward foot is raised only far enough for a piece of paper to slide under it.  
 To observe someone who is utilizing it, it could/should/would be difficult to identify it as being such. The weight distribution is 90-10.


Step Stance

  This stance has the same placement as a (“shallow”) Forward Stance, and amounts to a forward“weight shift” with weight distribution to 60/40 (it is very close to what Taika considers to be a “Bo Stance”which has a weight distribution of 50/50).


  We also teach the “Crane Stance”, and the “Reverse Stance”.

The “Crane Stance”, we use for “Balance” practice and the “Reverse” stance is similar to the “Cat” stance (in that it is a transitional/ending position for several techniques. At our school, we don't feel that these stances necessitate excessive practice. They (both) are performed in (several) kata, and (actually) have “legitimate” application for techniques in those instances.

  As a General description, The stances are not positions that an individual would be “standing in” and/or maintained necessarily. They are positions that will be utilized "during" or at the conclusion of various technique motions.


Beginning Tuite Technique List (Pushes)

  This is a list of Tuite techniques that our students are initially taught for responses to being "Pushed" (in various manners). Students are shown the technique motions, and those motions are practiced slowly so that the student can experience the various difficulties that can occur if/when they may be required to utilize them (in a defensive situation). 
 These techniques are practiced slowly and are practiced to a point of submission (of the uke). The Speed of technique application can only be increased with these techniques to a limited degree. Many of the techniques place the uke into a position of complete physical compromise, if speed were to be increased, or the tori did not release or cease the application of the technique, the uke would suffer physical injury (that isn't the purpose of our class). 
 These techniques will commonly become the foundation techniques for the variations that occur because of situational differences. There are 3 situations that tuite may prove to be applicable. These are attempts at being Grabbed, being Pushed and being Struck. Oyata's methodology provides responses for each of those situations. 
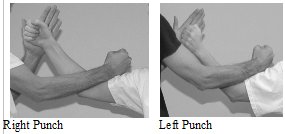
 The included "photo" is only for a visual reference for the shown techniques. There were never any "official" names for the techniques that were shown by Oyata, but each school has (often) come up their own manner of identifying each.
 At our school, this is commonly done by a visual reference of the technique we want the class to work on. Certain techniques have also acquired their own individual "names" that they have become identified by as well.
 I have provided (small) pictures here, of identifying motions for the individual applications. These are not being presented in any manner of "order". In our classes, everyone (regardless of "rank/level") works on the same technique. Variations are worked on as they are learned (by the individual student).
(BTW, None of these pictures are from our "new" Tuite publication, As you can observe, none of these were of any decent level of quality, LOL)


Pushing Responses

Push to Chest/2-Hand


Push to Chest/1-Hand


Naihanchi Push


Push Block/ Strike


Push-Catch (also known as “Palm Press)


Push-Step/Slap and High 5 Variation


Push Catch -Opposite Side


2 Hand Push (Cross)


Push-Catch/ Aggressor Grabs Tori's Hand


Primary Arm Goes Over Uke's forearm-Scissor


Push Catch (Miss to Outside (Flat-Support Grab)


Push Catch -Miss to Inside-Straight Arm


Push Catch -Miss to Inside


Push Catch -Miss to Outside (Both Thumbs Down)


Push Catch -Miss to Inside (Pinan - No Wrap)


Cross-Hand Catch (Side Tuck)


2-Handed Palm Press


Seated Push/Catch (Exercise)


2 Handed Push (Circular) 3 versions


Beginning Tuite Technique List (Grabs)

  This is a list of Tuite techniques that our students are initially taught for responses to being "grabbed" (in various manners). Students are shown the technique motions, and those motions are practiced slowly so that the student can experience the various difficulties that can occur if/when they may be required to utilize them (in a defensive situation). 
 These techniques are practiced slowly and are practiced to a point of submission (of the uke). The Speed of technique application can only be increased with these techniques to a limited degree. Many of the techniques place the uke into a position of complete physical compromise, if speed were to be increased, or the tori did not release or cease the application of the technique, the uke would suffer physical injury (that isn't the purpose of our class). 
 These techniques will commonly become the foundation techniques for the variations that occur because of situational differences. There are 3 situations that tuite may prove to be applicable. These are attempts at being Grabbed, being Pushed and being Struck. Oyata's methodology provides responses for each of those situations. 
 The included "photo" is only for a visual reference for the shown techniques. There were never any "official" names for the techniques that were shown by Oyata, but each school has (often) come up their own manner of identifying each.
 At our school, this is commonly done by a visual reference of the technique we want the class to work on. Certain techniques have also acquired their own individual "names" that they have become identified by as well. 
 I have provided (small) pictures here, of identifying motions for the individual applications. These are not being presented in any manner of "order" (of/for instruction). In our classes, everyone (regardless of "rank/level") works on the same techniques. Variations are worked on as they are learned (by the individual student).
(BTW, None of these pictures are from our "new" Tuite publication, As you can observe, none of these were of any decent level of quality, LOL)


Grabbing Responses

High (Horz.) Forearm Grab/Straight-Cross
 
Upper Arm Grab Straight (Grab Above Elbow)


Wrist Grab-One Arm Low with Two Hands


Wrist Grab Straight/Small Hook & Back of Hand


 Wrist Grab Cross/ Standard

Wrist Grab Cross/ Wrist Slide


Wrist Grab - Cross (Inverted Thumb)


Cross Arm Grab Vert. High


Double Lapel Grab


Double Lapel Grab (Aggressor Rolls Fists)


Bear Hug (outside)/ Triceps Flex/Arm Bar


Single Lapel Grab (3 diffeerent Initially taught defenses)


Double Wrist Grab-Rear


Both Arms Grabbed ,Wrist-Lock/Elbow Lock (2 versions)


Shoulder Grab From Back (Straight)


Single Wrist Grab From Rear (Straight)


Single Wrist Grab from Rear (Cross)


Wrist Grab (one arm low, with 2 hands)


Both Wrist's Grabbed (From Front, Low)


Choke Releases (3 different release methods shown)


MMA Type Start (Position)


High Double Forearm Grab (2 on 1)


Both Arm's Grabbed Above Elbows From Back


Headlock Escape


Wrist Grab Straight /Forearm Press


Double Wrist grab_Rear


2-Hand Escort (Type of) Restraint


 Though (by no means) ALL of the techniques we teach, these are the introductory (that are began during the student's first class). Taika always stated that it took time and practice to learn to correctly be able to utilize these techniques (as well as to just learn them).


Sunday, September 1, 2013

The Sub-Zero Response

 I've recently read a number of articles regarding the (supposedly) inevitable "Freeze" response.Though it is often comforting (?) for (new) students to read that this is a "natural" reaction, it isn't an "inevitable" response. 
 The act of "Freezing" (or having a lack of any response) in humans, is simply not knowing what to do. This is being (IMO) over played as being everyone's initial (and inevitable) response. The fact that "animals" do so (and for completely different reasons than humans do) is not a reason to believe that it is inevitable.This is both inaccurate, and untrue. That is the purpose of training.
 The act of Freezing will occur when one doesn't understand a situation/event, and/or they don't know how to respond during the occurrence of that event. One doesn't just "freeze" thoughtlessly, they are searching their own memories to (both) evaluate the situation, and to determine an appropriate response to that given situation. Even when an individual is completely "inexperienced" with an assault (type of) situation, they will (and do) react (just not always as effectively as they would like, hence they seek training).
 I'm fully aware that various author's have written entire books over related terminology regarding this singular aspect of human response (with numerous "names" being attributed to it, ie. "monkey-brain", "deer in the headlight" etc.). But the fact is, that through (correct) training this entire "pause" (effect/response?) can be nearly eliminated (through proper training).
 Can it always be (completely) eliminated for everyone, of course not. For different individual's and/or situations it will require different amounts and/or kinds of training and/or experience to reduce it to it's lowest possible levels (for that individual). 
 Those who tend to have the lowest levels of hesitation, are those who have the most training/experience (in this instance, these are interchangeable terms). 
"Training" really amounts to "you do this, when that occurs", and you practice doing those motions in response to similar actions. Training is learning to recognize threatening situations, and developing the ability to respond with an appropriate action. That action doesn't (or shouldn't) have to be one designed exactly for that particular event (to be an effective response).
 In/for a "defensive" situation, that response need only protect you (physically) until further evaluations can be made/established (regarding the situation at hand). Once having established and enacted an initial motion, it is (commonly) easier to react to further and/or continuing "threats". 
 The entire monologue that's being (over-blown IMO) presented, attempts to "justify/validate" this ("freeze") response as being "natural". To some (limited) extent, it is. Though It's nothing like what (or why) an animal will do (nor for the same reasons). That analogy is only being utilized as an example to provide a student with something to make them feel better (about not knowing what to do).
 That "hesitation" (in a human), is an indication of higher intelligence (than "animals", LOL). Humans do so, in order to search/reference their (vastly superior to animals) memories to reference if they are familiar with the given situation, and already have an appropriate response. Depending on one's level of experience (with the given situation), will determine the speed of that reaction.
 This can (often) be measured in micro-seconds (depending on one's level/amount of experience with a given situation). It is how that experience is acquired, that often differentiates the various training methodology's that are available. 
 Although I understand "why" the (animal) "freeze" analogy is often utilized, I have to disagree with the continued extrapolations that are commonly included with it. The whole conversation reminds me of Taika discussing (certain) "animal" forms/styles of martial arts. His (major) "point", was that people aren't animals, we don't have claws, or fangs, and our bodies are (in no way) built like those of animals. So why would one attempt to emulate the movements of an animal?
 IMO, the discussion regarding the "freeze" factor, is being similarly over emphasized (to the point of being a training distraction, if not an excuse for poor/inadequate training).